How to get a Custom Domain for your email using Cloudflare & GMail
Prerequisites:
- A domain
- Cloudflare account with the domain managed by CF
A Gmail inbox for receiving and sending (preferably a non personal account)
A: Receiving Mail:
Open Cloudflare
Sign in to your account
Select your domain > Select “email” in sidebar > then Routing rules
Press “Create Address”
Fill out details, ensuring Action is “send to email” (if making a no-reply address, set this to drop)
Repeat steps 4-5 for each additional receiving address
Navigate to the DNS tab and add a TXT Record with the following:
NAME: @
TTL: AUTO
CONTENTS: "v=spf1 include:_spf.mx.cloudflare.net include:_spf.google.com ~all"
B: Sending Mail.
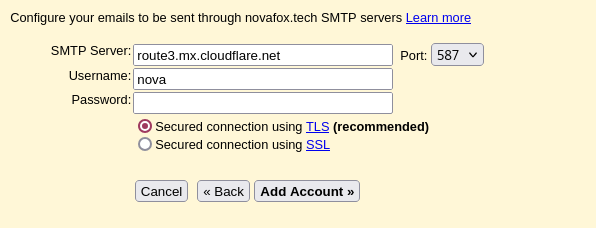
This gets its own section as this is harder. 1. Create a Google App Password for the receiving account, you can do this at https://security.google.com/settings/security/apppasswords, keep this safe in a password manager, you'll need it when adding new aliases to gMail 2. Press settings > All Settings > Accounts and Import > Add another email address (under Send Mail As) 3. Fill the popup form out with your desired name and email 4. gMail attempts to fill out the config with Cloudflare info by default, like below, however we need to change this so that gMail is in charge of the SMTP server
| Incorrect Cfg | Correct Cfg |
 |  |
Security
This is not needed per se but is recommended if you don't want email spoofing to happen as easily, but is complicated.
1. Add a DNS Record like shown in Part A, Step 7, this time set it's content to:
v=DMARC1; p=none; rua=mailto:[email protected]
for multiple addresses, simply comma separate them like this:
v=DMARC1; p=none; rua=mailto:[email protected], [email protected]
Now your email is configured!
Currently, direct comments are unavaliable, but support is coming soon. For now, you can join the discussion via Discord!
